Rear struts install 07 TCH
#1
 11-16-2013, 06:32 PM

Phew... That was some work out. And I am going to save you some time and effort.
Book says to have seat cushion AND backrests removed.
DO NOT REMOVE BACKRESTS.
All you need to do is to pull seat cushion out and remove side bolsters.You can lower back rests for better bolsters removal/install, but that's it.
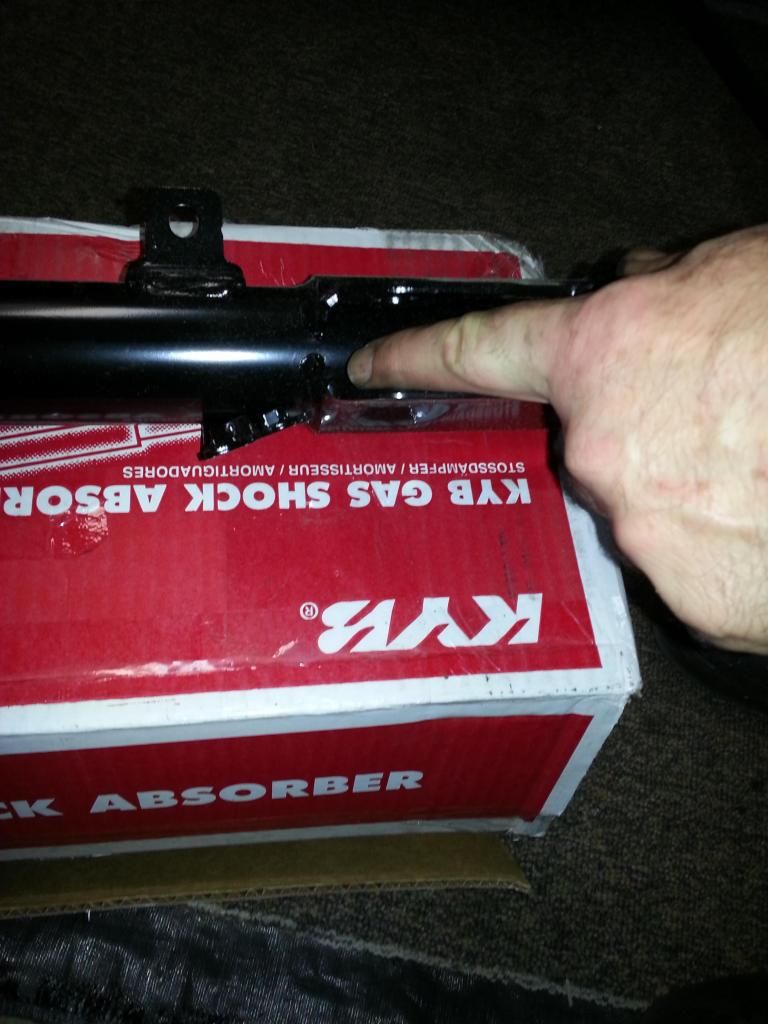
This time I went for KYB OEM struts vs Monroes I did for the front. I am regretting, I did not do KYB for the front. I am very likely to swap Monroe for KYB. Reason being, KYB strut has a flange that takes care of camber and Monroe does not. Plus, KYB turned out to be a much more stout strut.
All I can say - OMG, THAT is how that car drove new!
Anyhow.
Here's link to slideshow album:
http://s302.photobucket.com/user/ukr...%20replacement
And here's video of old strut action vs new one. I dead lift 360 lbs x 3-4, and I had hard time moving that strut.
Tools needed:
10mm 12mm 19mm sockets; 19mm box wrench; punch and hammer; pry bar; jack stand; preferably impact wrench or breaker bar
1. Pull seat cushion out. Out of all job, it was the worst one to do. Even with pry bar, took me half an hour and a lot of cussing. Clips simply won't let go:
20131116_074015_zpsa1f46ceb.jpg
20131116_074036_zpsf3c2c455.jpg
2. If you really want to, you may lower back rests, and undo 2 x 12mm bolts holding them to brackets:
20131116_074318_zps0cf4305b.jpg
20131116_074821_zps1e05b9d0.jpg
3. Now you have lower side bolster12mm mounting bolt exposed:
20131116_074229_zps0886dab6.jpg
Undo it and pull - very hard - bolster up. With some effort and fancy language, it'll pop at the top from a bracket holding hook in place.
Here you can see that bracket and upper strut bolts
20131116_080657_zps142e14c6.jpg
4. Loosen lug nuts and lift car. Remove wheel. Remove sway bar strut link attachment.
20131116_082652_zps1a3c96c6.jpg
5. Remove 12mm brake line bolt:
20131116_082400_zpsc201ac0d.jpg
6. Remove 10mm ABS line bolt:
20131116_082455_zps7608aebc.jpg
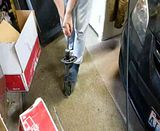
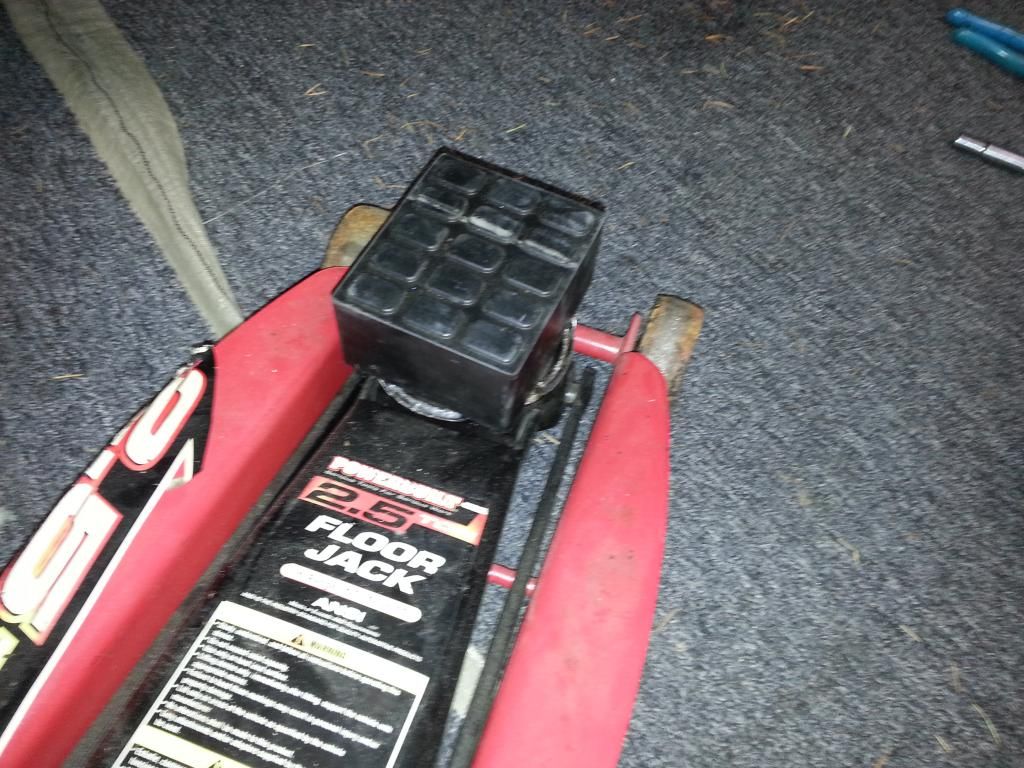
7. Grab a jack and fix wooden or rubber chock on it:
8. Set jack under control arm attachment and slightly raise vehicle up:
20131116_083344_zps9a5333c1.jpg
9. Loosen upper strut bolts nuts but leave them on:
20131116_083006_zpsa00dafd2.jpg
10. Undo 19mm strut mount bolts; punch them out; You may want to play a little bit with raising and lowering hub by jack, to find loose enough position to take bolts out. The very moment you have both bolts out, knuckle falls out of strut towards you, but not too far. I could reach with laeft hand to hold strut up and undo upper nuts by hand, simply lifting strut up into the tire well.
20131116_083846_zps46a399b0.jpg
11. Move strut down and towards mid line; lean upper part out and pull strut out. Plenty of room.
20131116_084426_zps8ada0541.jpg
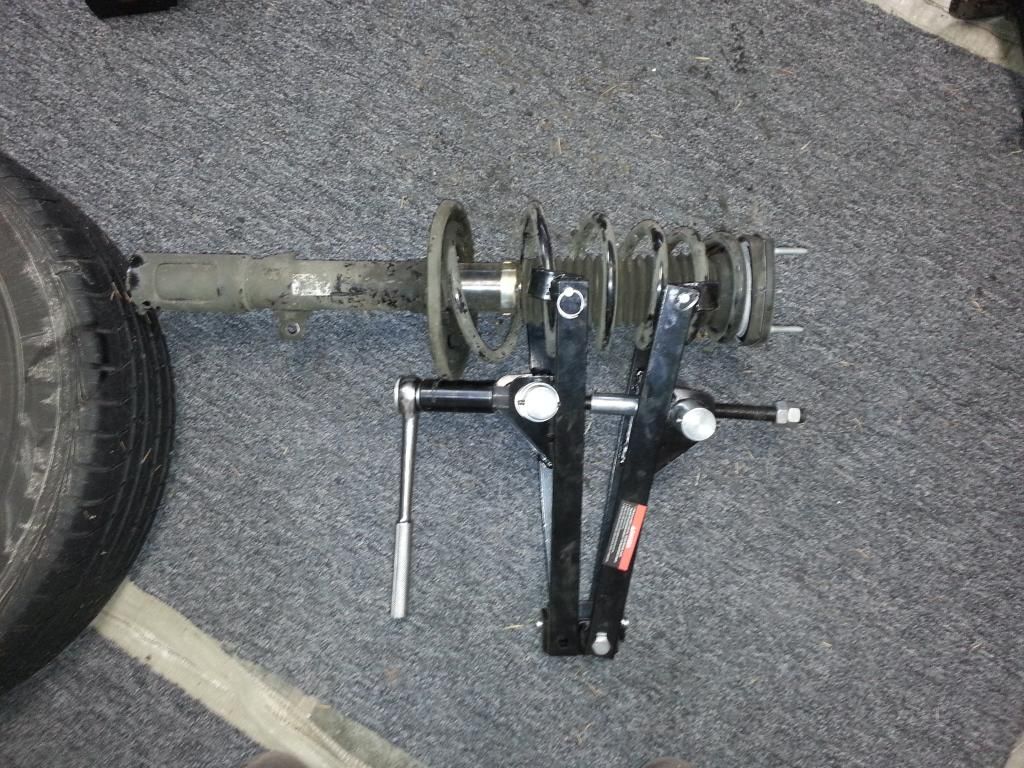
12. See diff between pass side atrut on the R and driver side strut on the L. No idea. Make sure you order correct sides.
20131116_084856_zpsa7dd4611.jpg
13. Insatll fancy clamshell compressor ($32 ebay) and compress spring. BEFORE COMPRESSING SPRING INSPECT AND MEMORIZE HOW UPPER MOUNT IS SITUATED AGAINST STRUT. IT IS TRIANGULAR IN SHAPE WITH ONE SIDE POINTING TOWARDS KNUCKLE BRACKET CENTER.
13. Breal strut rod nut loose. I used pmpact wrench and it popped right away. To prevent strut bearing from spinning during nut removal, jam pry bar between 2 bearing plate bolts. 19mm nut. I reused original nut as it has flange on it. THERE IS A SLEEVE UNDERNEATH THAT NUT, DO NOT LOSE IT!! I also lubricated spring guides with grease with PTFA.
20131116_091017_zps654ddb5b.jpg
14. Reassemble strut. Lower plate and spring can go in only one way. Upper, bearing part, is a bit trickier, as there is no defined end to where spring stops. LIke I said, simply align bearing with knuckle bracket but be as precise as you can, or you will have hard time inserting upper bolts into holes. Thread on 19mm strut nut and tighten it in place but do not torque, as it is very hard to do with loose spring. Loosen spring, continuously checking on how it sits in both plates. Remove compressor and TORQUE THE NUT.
Now it's fun part. Took me really a while to get strut back in on pass side. Do yourself a favor - before you start, reach into tire well and remove layers and clumps of dirt by hand. Or, it will all fall down into your face, when you stick your head there trying to match bolts and holes. Knuckle will try to catch on the knuckle bracket, so keep lower strut away from knuckle and do your best to insert bolts into holes. On pass side, for some reason bolts went in right away. As soon as you got bolts in, thread 12mm nuts onto them but leave loose, so that you can wiggle strut around.
Wiggle knuckle into the strut bracket and start raising/lowering hub by jack, until you align strut knuckle mount holes. Slide 19mm bolts in. Upper one goes in easy. Lower one is harder to get in, as it's blocked by caliper (you can remove caliper from hub if you want to); I used long flat head to align bottom hole, slide bolt in as much as I could, then thread it in with wrench. As soon as it comes out on the other side, grab it with 19mm nut, and spin nut, it'll pull bolt in.
Torque both bolts to 133 lb foot. Impact wrench come handy again.
Set magnetic protractor on rotor, make sure rotor is solid against hub, and check on camber:

Otherwise, all alignment settings should be same.
15. Tighten 12mm upper strut bolts to 33 lb foot.
16. Re assemble all lines and seats/bolsters.
Done. Took me only about 4 hrs. But, a lot of time was wasted on removing seat cushion (btw, fuel pump is right there, underneath driver side seat cushion) and back rests. Took me only about 20 minutes to do driver side.
I'd say, now that you know what you doing, it's easy 2 hr job.
Book says to have seat cushion AND backrests removed.
DO NOT REMOVE BACKRESTS.
All you need to do is to pull seat cushion out and remove side bolsters.You can lower back rests for better bolsters removal/install, but that's it.
This time I went for KYB OEM struts vs Monroes I did for the front. I am regretting, I did not do KYB for the front. I am very likely to swap Monroe for KYB. Reason being, KYB strut has a flange that takes care of camber and Monroe does not. Plus, KYB turned out to be a much more stout strut.
All I can say - OMG, THAT is how that car drove new!

Anyhow.
Here's link to slideshow album:
http://s302.photobucket.com/user/ukr...%20replacement
And here's video of old strut action vs new one. I dead lift 360 lbs x 3-4, and I had hard time moving that strut.
Tools needed:
10mm 12mm 19mm sockets; 19mm box wrench; punch and hammer; pry bar; jack stand; preferably impact wrench or breaker bar
1. Pull seat cushion out. Out of all job, it was the worst one to do. Even with pry bar, took me half an hour and a lot of cussing. Clips simply won't let go:
20131116_074015_zpsa1f46ceb.jpg
20131116_074036_zpsf3c2c455.jpg
2. If you really want to, you may lower back rests, and undo 2 x 12mm bolts holding them to brackets:
20131116_074318_zps0cf4305b.jpg
20131116_074821_zps1e05b9d0.jpg
3. Now you have lower side bolster12mm mounting bolt exposed:
20131116_074229_zps0886dab6.jpg
Undo it and pull - very hard - bolster up. With some effort and fancy language, it'll pop at the top from a bracket holding hook in place.
Here you can see that bracket and upper strut bolts
20131116_080657_zps142e14c6.jpg
4. Loosen lug nuts and lift car. Remove wheel. Remove sway bar strut link attachment.
20131116_082652_zps1a3c96c6.jpg
5. Remove 12mm brake line bolt:
20131116_082400_zpsc201ac0d.jpg
6. Remove 10mm ABS line bolt:
20131116_082455_zps7608aebc.jpg
7. Grab a jack and fix wooden or rubber chock on it:

8. Set jack under control arm attachment and slightly raise vehicle up:
20131116_083344_zps9a5333c1.jpg
9. Loosen upper strut bolts nuts but leave them on:
20131116_083006_zpsa00dafd2.jpg
10. Undo 19mm strut mount bolts; punch them out; You may want to play a little bit with raising and lowering hub by jack, to find loose enough position to take bolts out. The very moment you have both bolts out, knuckle falls out of strut towards you, but not too far. I could reach with laeft hand to hold strut up and undo upper nuts by hand, simply lifting strut up into the tire well.
20131116_083846_zps46a399b0.jpg
11. Move strut down and towards mid line; lean upper part out and pull strut out. Plenty of room.
20131116_084426_zps8ada0541.jpg
12. See diff between pass side atrut on the R and driver side strut on the L. No idea. Make sure you order correct sides.
20131116_084856_zpsa7dd4611.jpg
13. Insatll fancy clamshell compressor ($32 ebay) and compress spring. BEFORE COMPRESSING SPRING INSPECT AND MEMORIZE HOW UPPER MOUNT IS SITUATED AGAINST STRUT. IT IS TRIANGULAR IN SHAPE WITH ONE SIDE POINTING TOWARDS KNUCKLE BRACKET CENTER.

13. Breal strut rod nut loose. I used pmpact wrench and it popped right away. To prevent strut bearing from spinning during nut removal, jam pry bar between 2 bearing plate bolts. 19mm nut. I reused original nut as it has flange on it. THERE IS A SLEEVE UNDERNEATH THAT NUT, DO NOT LOSE IT!! I also lubricated spring guides with grease with PTFA.
20131116_091017_zps654ddb5b.jpg
14. Reassemble strut. Lower plate and spring can go in only one way. Upper, bearing part, is a bit trickier, as there is no defined end to where spring stops. LIke I said, simply align bearing with knuckle bracket but be as precise as you can, or you will have hard time inserting upper bolts into holes. Thread on 19mm strut nut and tighten it in place but do not torque, as it is very hard to do with loose spring. Loosen spring, continuously checking on how it sits in both plates. Remove compressor and TORQUE THE NUT.
Now it's fun part. Took me really a while to get strut back in on pass side. Do yourself a favor - before you start, reach into tire well and remove layers and clumps of dirt by hand. Or, it will all fall down into your face, when you stick your head there trying to match bolts and holes. Knuckle will try to catch on the knuckle bracket, so keep lower strut away from knuckle and do your best to insert bolts into holes. On pass side, for some reason bolts went in right away. As soon as you got bolts in, thread 12mm nuts onto them but leave loose, so that you can wiggle strut around.
Wiggle knuckle into the strut bracket and start raising/lowering hub by jack, until you align strut knuckle mount holes. Slide 19mm bolts in. Upper one goes in easy. Lower one is harder to get in, as it's blocked by caliper (you can remove caliper from hub if you want to); I used long flat head to align bottom hole, slide bolt in as much as I could, then thread it in with wrench. As soon as it comes out on the other side, grab it with 19mm nut, and spin nut, it'll pull bolt in.
Torque both bolts to 133 lb foot. Impact wrench come handy again.
Set magnetic protractor on rotor, make sure rotor is solid against hub, and check on camber:

Otherwise, all alignment settings should be same.
15. Tighten 12mm upper strut bolts to 33 lb foot.
16. Re assemble all lines and seats/bolsters.
Done. Took me only about 4 hrs. But, a lot of time was wasted on removing seat cushion (btw, fuel pump is right there, underneath driver side seat cushion) and back rests. Took me only about 20 minutes to do driver side.
I'd say, now that you know what you doing, it's easy 2 hr job.
#2
11-17-2013, 06:25 PM
This is AWESOME!!!! I have been wanting to replace my struts for so long. I feel like my car handles like crap.... You know..... You get used to it over time.
So KYB for all four corners! Right on!
Thank you for sharing!!
Edit: Good to see that I am not the only one that paints their "rotor hats"!
So KYB for all four corners! Right on!
Thank you for sharing!!
Edit: Good to see that I am not the only one that paints their "rotor hats"!
Last edited by litespeed; 11-17-2013 at 06:29 PM. Reason: hats
#3
11-18-2013, 05:41 PM
Yes, please, do KYBs. I'd still buy that $8 protractor from Home Depot.
Also, you are not likely to get far without impact wrench. And buy set of camber bolts just in case, you can always return them.
I aint painted nothing. That rotor came like this from O'reilley's.
Also, you are not likely to get far without impact wrench. And buy set of camber bolts just in case, you can always return them.
I aint painted nothing. That rotor came like this from O'reilley's.
#4
11-19-2013, 05:49 PM
Well, and we have problem.
Car drives great!!
Except that now I do not quite like them Monroes in the front. I CAN tell the diff between the two brands. Plus, I can't get over driving around with dem camber bolts because of this.
Oh well. Not much expense, was only around $130 for both. I am very likely to swap them out for KYB-s soon.
#5
11-27-2016, 07:30 AM
BTW, I need to chastise and correct myself. Do NOT do camber adjustment as I described it. Wheels have to be full weight bearing. You can NOT do this on jackstands. Maybe on ramps. It is not worth the hassle and eaten tires to NOT pay shop $70 for alignment and have it done right.


Thread
Topic Starter
Forum
Replies
Last Post


