Water pump replacement "How To"
#1
 01-05-2013, 09:08 PM


OK guys (and gals), we have had several posts about the water pumps going out on our Camry's and noticed mine was leaking while changing the oil
on it Wednesday. This afternoon was the first time I had free to replace it and decided to write up a "how to" for the water pump, sepentine
belt and thermostat on our Camry's in case anyone else would like to do this job yourself. By the way, all of the parts were less than $100
total.
Please note, it you are mechanically challenged, do not attempt this. If you do normal maintenance on your cars, can replace the plugs and maybe
have done a water pump or something similar on another car, this is easily within your skill range. BE SAFE IF YOU DO THIS. I AM NOT YOUR DADDY
OR YOUR MOMMY AND YOU ARE ON YOUR OWN FOR SAFE WORKING PRACTICES. DON'T COME CRYING TO ME IF YOU SCREW UP.
As for tools, at a minimum you need a set of jack stands, a floor jack, three sockets (12mm, 14 mm and 21mm), a ratchet, a couple of extensions
and a serpentine belt tool (or wrench that will work). If you have access to air tools, they will help but they are not required by no means.
Water_Pump1.jpg
Well, here is where we start, I know that pesky water pump is down here somewhere....
Water_Pump2.jpg
Start by jacking up the car, putting a jack stand at the jacking point on the frame and remove the right front wheel. The wheel lug nuts take a
21mm socket to remove.I cheated here as I am lucky enough to have a lift at home which makes this a little easier.
Water_Pump3.jpg
Remove the two inner fenderwell cover bolts and rotate the cover downwards.
Water_Pump4.jpg
Remove the lower cross braces on both sides of the car.
Water_Pump5.jpg
For the next fasteners, you might invest in a center pin removal plier. They come in handy removing the plastic pin fasteners on late model cars.
Water_Pump6.jpg
Remove the left and right lower engine covers from underneath the car.
Water_Pump7.jpg
At this point, drain the radiator and engine block using the two drain petcocks.
Water_Pump8.jpg
You should now have total access to the bottom of the water pump thru the wheel well.
Water_Pump9.jpg
Remove the engine mounting stay on the left side.
Water_Pump11.jpg
This is the stay removed.
Water_Pump12.jpg
Next up is the engine control rod. There are three large bolts to remove it.
Water_Pump13.jpg
Here is the control rod assembly out.
Water_Pump14.jpg
Next comes the right hand engine mount bracket and don't forget to remove the small bolt and take off the ground wire.
Water_Pump15.jpg
Here is the engine mount bracket on the floor.
Water_Pump16.jpg
Next up is the serpentine belt cover. Two bolts hold it in place.
Last edited by GeorgiaHybrid; 01-06-2013 at 01:12 PM.
#2
01-05-2013, 09:09 PM
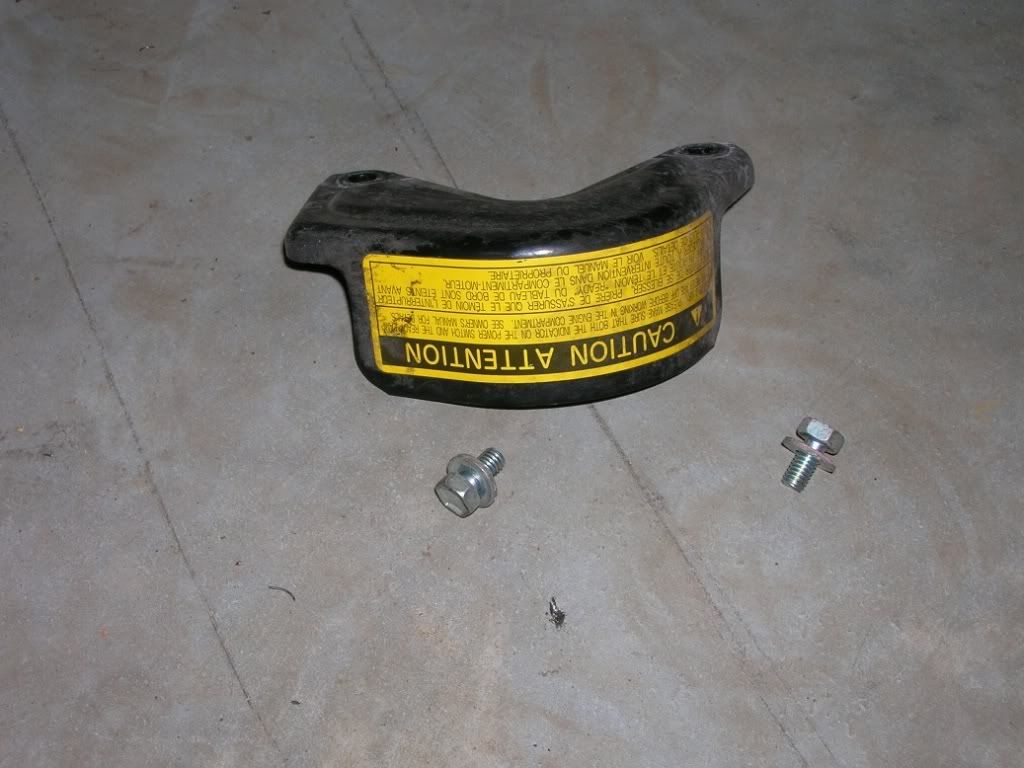
And here it is taking it's place on the floor.
Water_Pump18.jpg
Another tool you might want to think about getting someday is a serpentine belt tool. You can use a wrench here but a proper tool makes this
easy.
Water_Pump19.jpg
Using your tool of choice, remove the serpentine belt.
Water_Pump20.jpg
You should now be able to remove the tensioner assembly.
Water_Pump21.jpg
As before, here is the tensioner off of the car.
Water_Pump24.jpg
This is one place a special wrench will be required. We now need to remove the water pump pulley.
Water_Pump25.jpg
Here are some of the wrenches I use for these. A good strap wrench can also be used as you will need to hold the pulley and remove the 4 bolts.
For this car, I used the chain vise grips as they are easy to get on/off.
Water_Pump26.jpg
It's obvious looking at the backside of the pulley that this pump started leaking right after the last oil change. It was down about a quart of
fluid thru a leak in the bearing.
Water_Pump29.jpg
You will need to pry the plastic clip out of the recess in the water pump that holds the crankshaft sensor in place. Don't force it and take your
time and it will slip right out. While you are here, remove the lower water pump bolts that you can reach.
Water_Pump27.jpg
Back on top, remove the nut and bolt holding the crankshaft sensor wire, disconnect the wire at the plug and to make things easier, remove the
upper bracket that holds the connector plug in place.
Water_Pump30.jpg
Remove the remaining bolts/nuts and gently pry the water pump off of the block and remove it.
Water_Pump32.jpg
Thoughly clean the block and remove EVERY trace of the old, formed in place gasket. When done, it should look like this. Note that my new pump
used a paper gasket. If you are using an OEM pump, you will need to use RTV gasket sealant for this. Follow the directions for your pump as
required.
Water_Pump33.jpg
While we are here, go ahead and replace the thermostat. It is in this housing.
Water_Pump34.jpg
Two nuts and gently pry the old thermostat out and this is what you have.
Water_Pump35.jpg
Put the new gasket around the outer edges of the new thermostat and place it in the block just like the old one came out. When done, it will look
like this. Replace the housing and it is done.
Water_Pump36.jpg
You should also replace the serpentine belt at this time.
Assembly is the reverse of taking it apart. Take your time, snug up the bolts and make sure you don't overtighten the bolts in the aluminum block
and brackets. Congratulate yourself for having saved $250 to $300 dollars (or more) by doing it yourself and take that money and buy more of your
favorite adult beverage (or some more ammo), sit back and relax.
Last edited by GeorgiaHybrid; 01-06-2013 at 01:18 PM.
#3
01-05-2013, 09:40 PM
One other thing, when filling the radiator, put your heater on maximum (turn the temp all of the way up and put the car into maint mode. To do that, do not touch the brake, turn the ignition on, press the accelerator pedal to the floor twice with the car in park, put your foot on the brake and put the transmission in neutral, let off of the brake, press the accelerator to the floor twice, put your foot back on the brake, put the tranny back into park, let off the brake, press the accelerator pedal to the floor twice again. You will now see the master caution light and the center display will say Maint mode.
Put your foot on the brake and press the start button. This will force the car to run without shutting off when it gets up to temp. Make sure all of the air bubbles are out of the system before replacing the radiator cap.
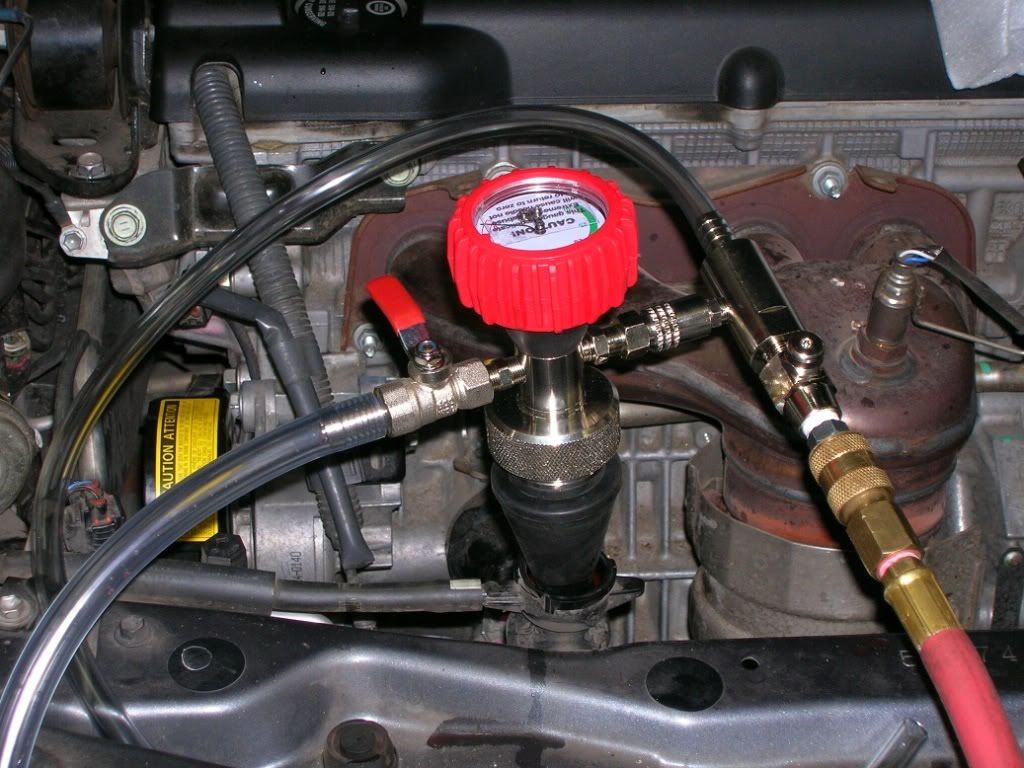
Again, I cheated a little and used a vacuum fill sytem to pull a 26 psi vacuum on the sytem and power filled the radiator and heater core. Just take your time, make sure you keep the radiator topped up and replace the cap once the system is filled.
To get the car out of maint. mode, turn the engine off. The next time you crank it, it will be back to normal driving mode.
Put your foot on the brake and press the start button. This will force the car to run without shutting off when it gets up to temp. Make sure all of the air bubbles are out of the system before replacing the radiator cap.
Again, I cheated a little and used a vacuum fill sytem to pull a 26 psi vacuum on the sytem and power filled the radiator and heater core. Just take your time, make sure you keep the radiator topped up and replace the cap once the system is filled.
To get the car out of maint. mode, turn the engine off. The next time you crank it, it will be back to normal driving mode.
Last edited by GeorgiaHybrid; 01-06-2013 at 10:34 AM.

#5
01-06-2013, 08:33 AM

Excellent write up. Since the 2012 TCH engine is beltless, I presume they have changed the water pump design on the 2012 from the one in this write up? Any idea if it is suffering from the same premature seal failure as the original water pump?
#6
01-06-2013, 10:40 AM
Ron,
I think they redesigned the water pump but to be honest about it, I consider them a "consumable" item that should be changed aound the 100,000 mile mark. On a car with a timing belt, I always changed them when the belt was replaced. For this car however, the engine uses a chain that does not need to be replaced as often.
I went back with a Japanese made (but not OEM) pump that uses a gasket as I HATE RTV with a passion. The only thing worse is anti-seize which has the same problem, it gets on everything before I'm done with it.
Last edited by GeorgiaHybrid; 01-06-2013 at 01:21 PM.
#7
01-07-2013, 04:49 AM

Ridiculously Active Enthusiast
Join Date: Jun 2007
Location: Southern New Mexico
Posts: 1,312
Thanks GeorgiaHybrid for the very best detailed pictures and instructions I have ever seen on how to replace something like the water pump on the the Camry hybrid engine.
#8
01-08-2013, 07:56 PM
Thanks, man or woman, great help!!
2 questions:
1. How long exactly?
2. How in the world did you know this:
maint mode. To do that, do not touch the brake, turn the ignition on, press the accelerator pedal to the floor twice with the car in park, put your foot on the brake and put the transmission in neutral, let off of the brake, press the accelerator to the floor twice, put your foot back on the brake, put the tranny back into park, let off the brake, press the accelerator pedal to the floor twice again. You will now see the master caution light and the center display will say Maint mode.
#9
01-09-2013, 09:37 AM
Thanks, man or woman, great help!!
2 questions:
1. How long exactly?
2. How in the world did you know this:
maint mode. To do that, do not touch the brake, turn the ignition on, press the accelerator pedal to the floor twice with the car in park, put your foot on the brake and put the transmission in neutral, let off of the brake, press the accelerator to the floor twice, put your foot back on the brake, put the tranny back into park, let off the brake, press the accelerator pedal to the floor twice again. You will now see the master caution light and the center display will say Maint mode.
2 questions:
1. How long exactly?
2. How in the world did you know this:
maint mode. To do that, do not touch the brake, turn the ignition on, press the accelerator pedal to the floor twice with the car in park, put your foot on the brake and put the transmission in neutral, let off of the brake, press the accelerator to the floor twice, put your foot back on the brake, put the tranny back into park, let off the brake, press the accelerator pedal to the floor twice again. You will now see the master caution light and the center display will say Maint mode.
2) I thought we had this posted here before.... You can also enter the maint mode with a Techstream but this way is faster. If you live in a state where they have emissions testing and your car keeps shutting off before the test is over, this is how you keep them running. By the way, this is in the shop manual and I am a man.
Last edited by GeorgiaHybrid; 02-03-2013 at 05:59 AM.
#10
01-09-2013, 06:29 PM
You are The Man, not A Man.
I do have all you mentioned. Lift, all tools needed and worked on my cars since 91.
LAst question. What did you use for sealant? They have some grey goop on it.
Thanks, Man.
I do have all you mentioned. Lift, all tools needed and worked on my cars since 91.
LAst question. What did you use for sealant? They have some grey goop on it.
Thanks, Man.


